git --versionGit and GitHub
2024-09-09
Motivation
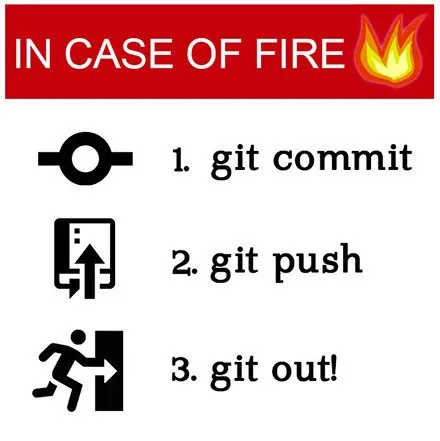
We want to avoid this:

Posted by rjkb041 on r/ProgrammerHumor
Motivation
- Git is a version control system that provides a systematic approach to keeping versions of files.

Posted on devrant.com/ by bhimanshukalra
Motivation
But we have to learn some things.
From Meme Git Compilation by Lulu Ilmaknun Qurotaini
What is Git?
From Meme Git Compilation by Lulu Ilmaknun Qurotaini
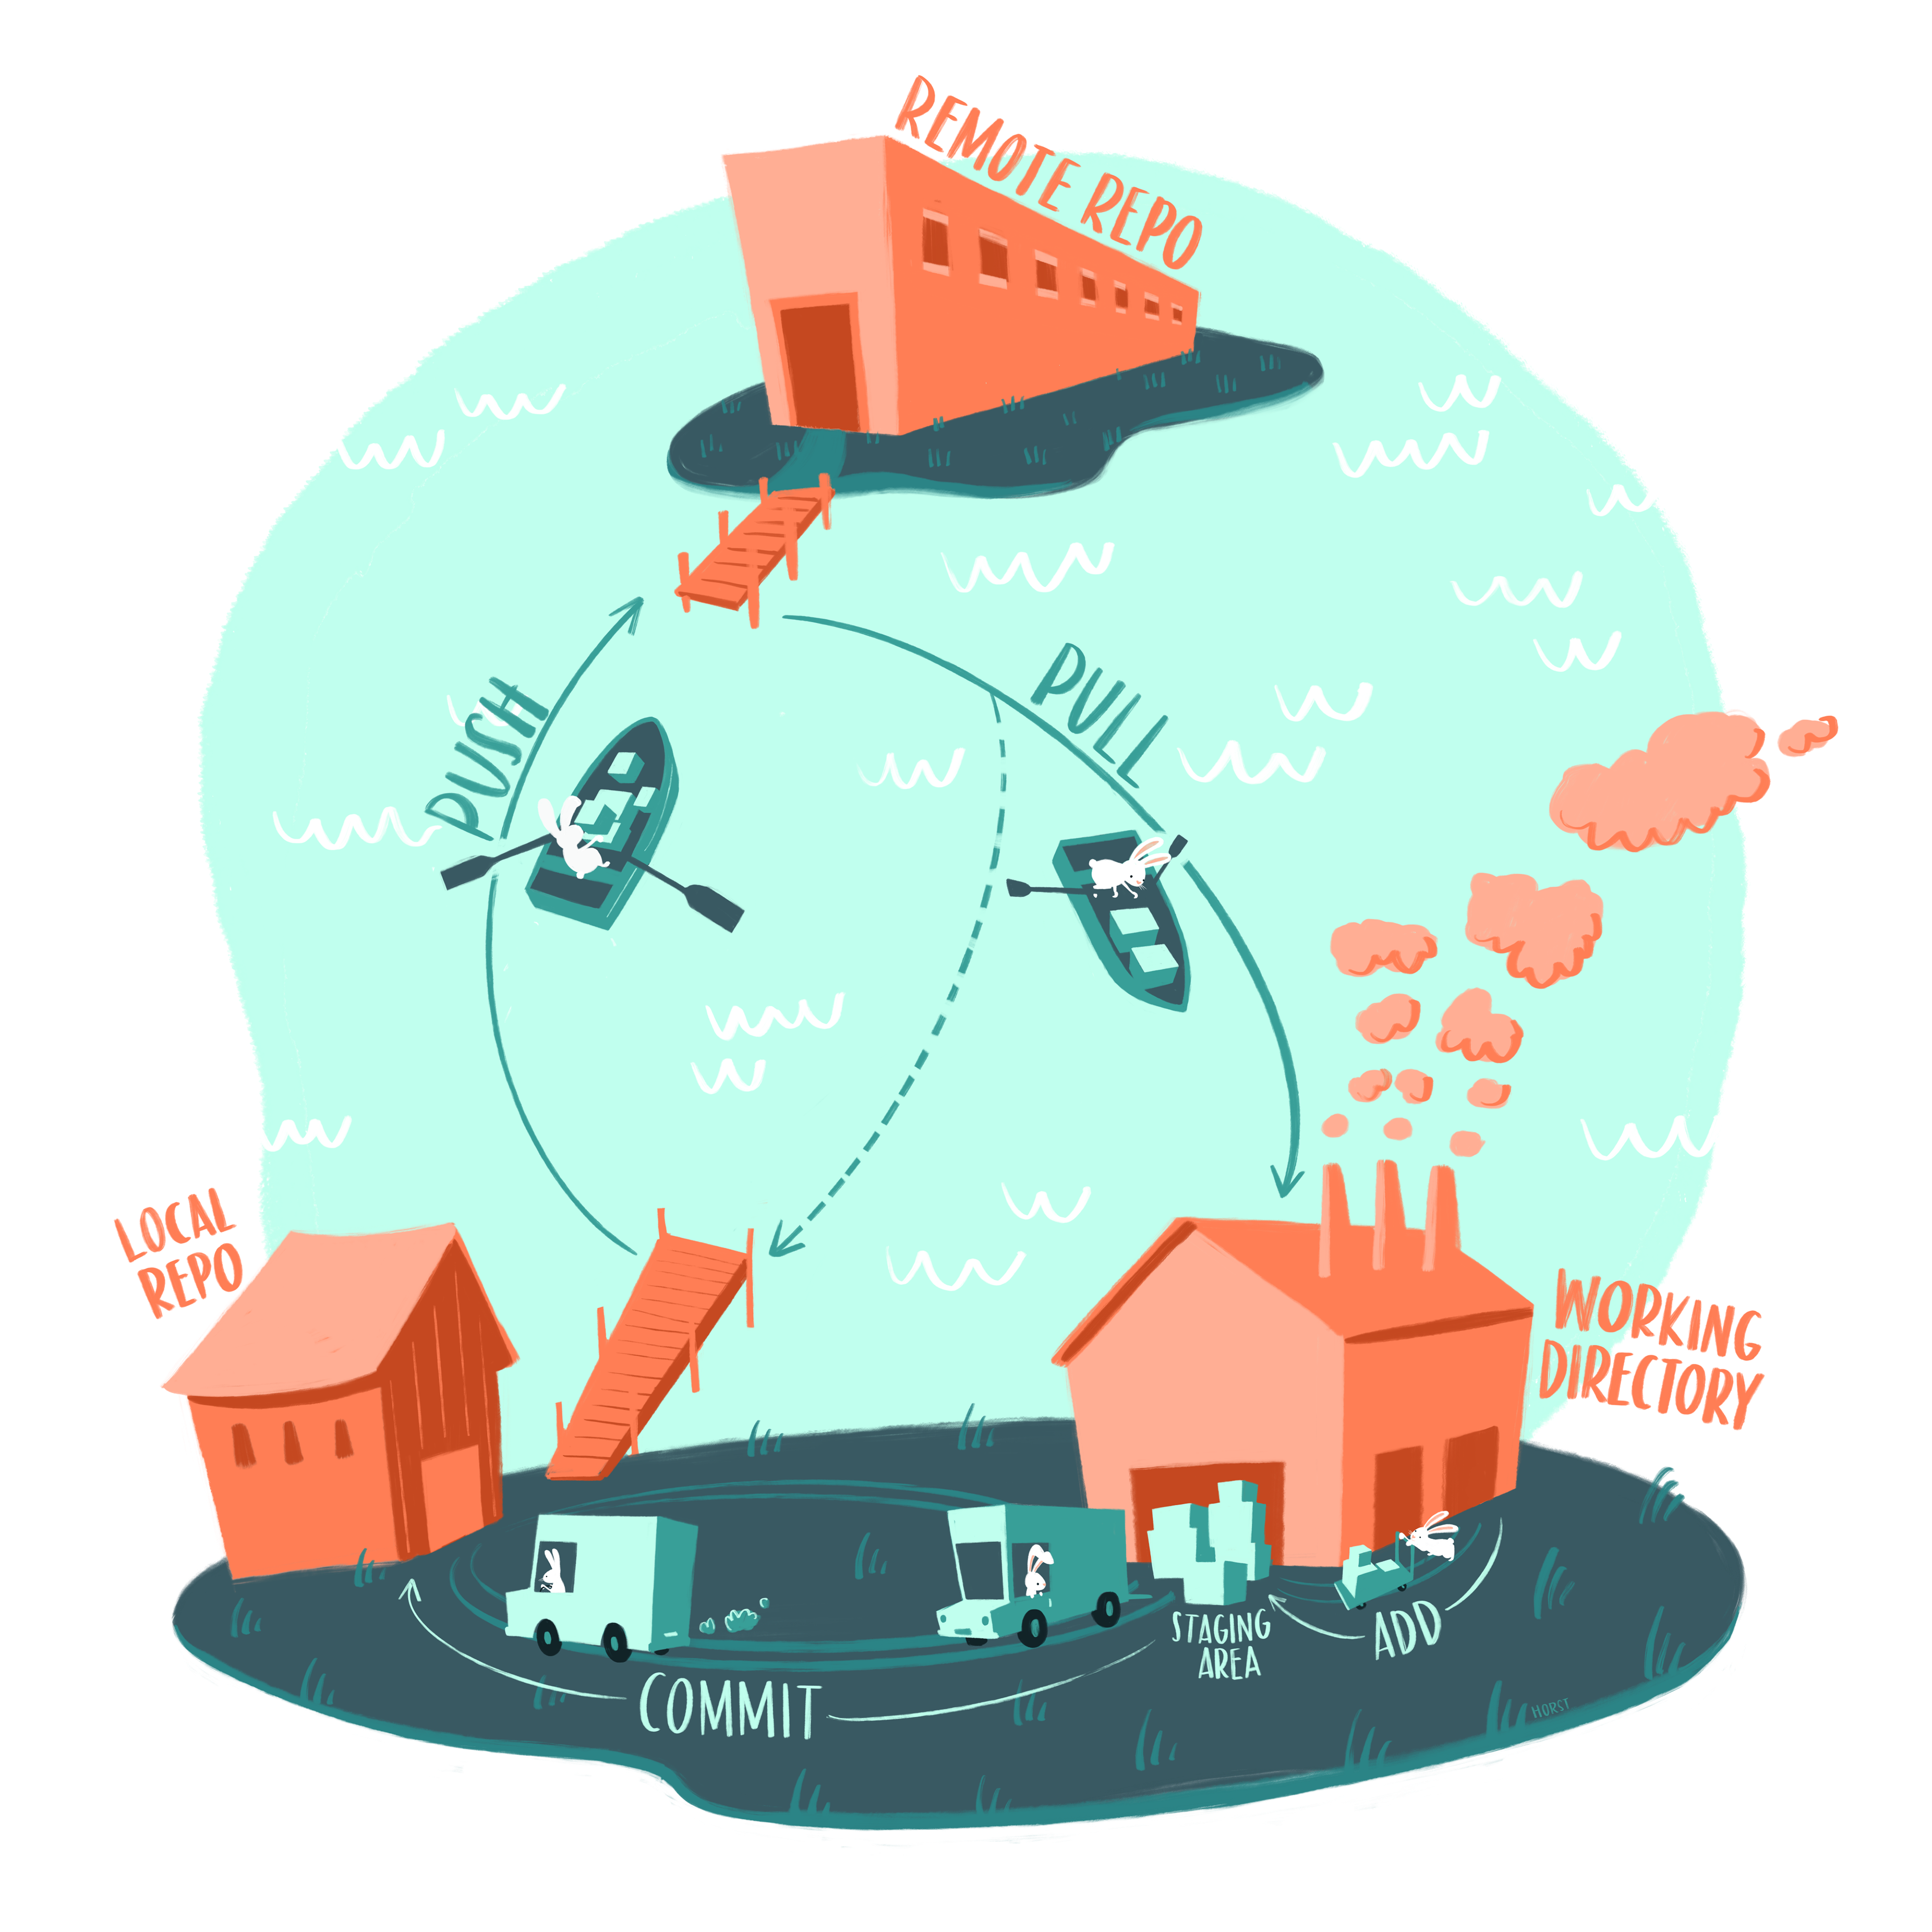
The four areas of Git

Status

git status filenameAdd
Use git add to put file to staging area.
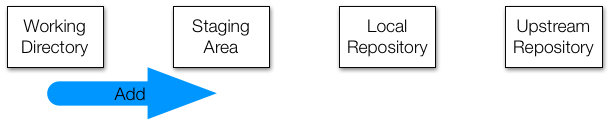
git add <filename>We say that this file has been staged. Check to see what happened:
git status <filename>Commit
- To move all the staged files to the local repository we use
git commit.
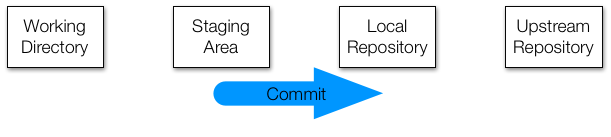
git commit -m "must add comment"Once committed the files are tracked and a copy of this version is kept going forward.
This is like adding
V1to your filename.
Push
- To move to upstream repo we use
git push
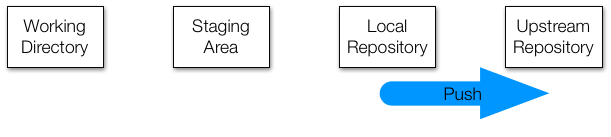
git push -u origin mainThe
-uflag sets the upstream repo.By using this flag, going forward you can simply use
git pushto push changes.So going forward we can just type:
git pushPush
When using
git pushwe need to be careful as if collaborating this will affect the work of others.It might also create a
conflict.

Posted by andortang on Nothing is Impossible!
Fetch
- To update our local repository to the remote one we use
git fetch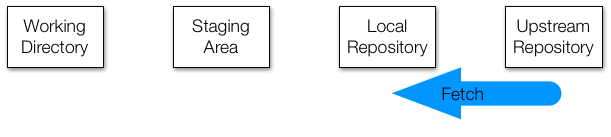
Merge
- Once we are sure this is good, we can merge with our local files:
git merge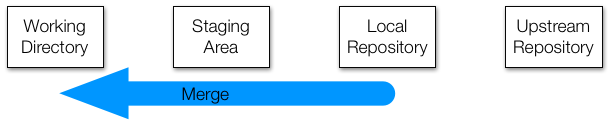
Pull
I rarely use fetch and merge and instead use pull which does both of these in one step
git pull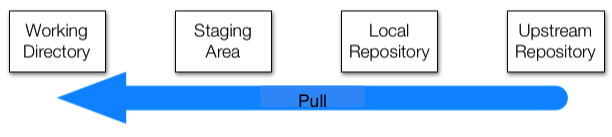
Branches
We are just sratching the surface of Git.
One advanced feature to be aware of is that you can have several branches, useful for working in parallel or testing stuff out that might not make the main repo.
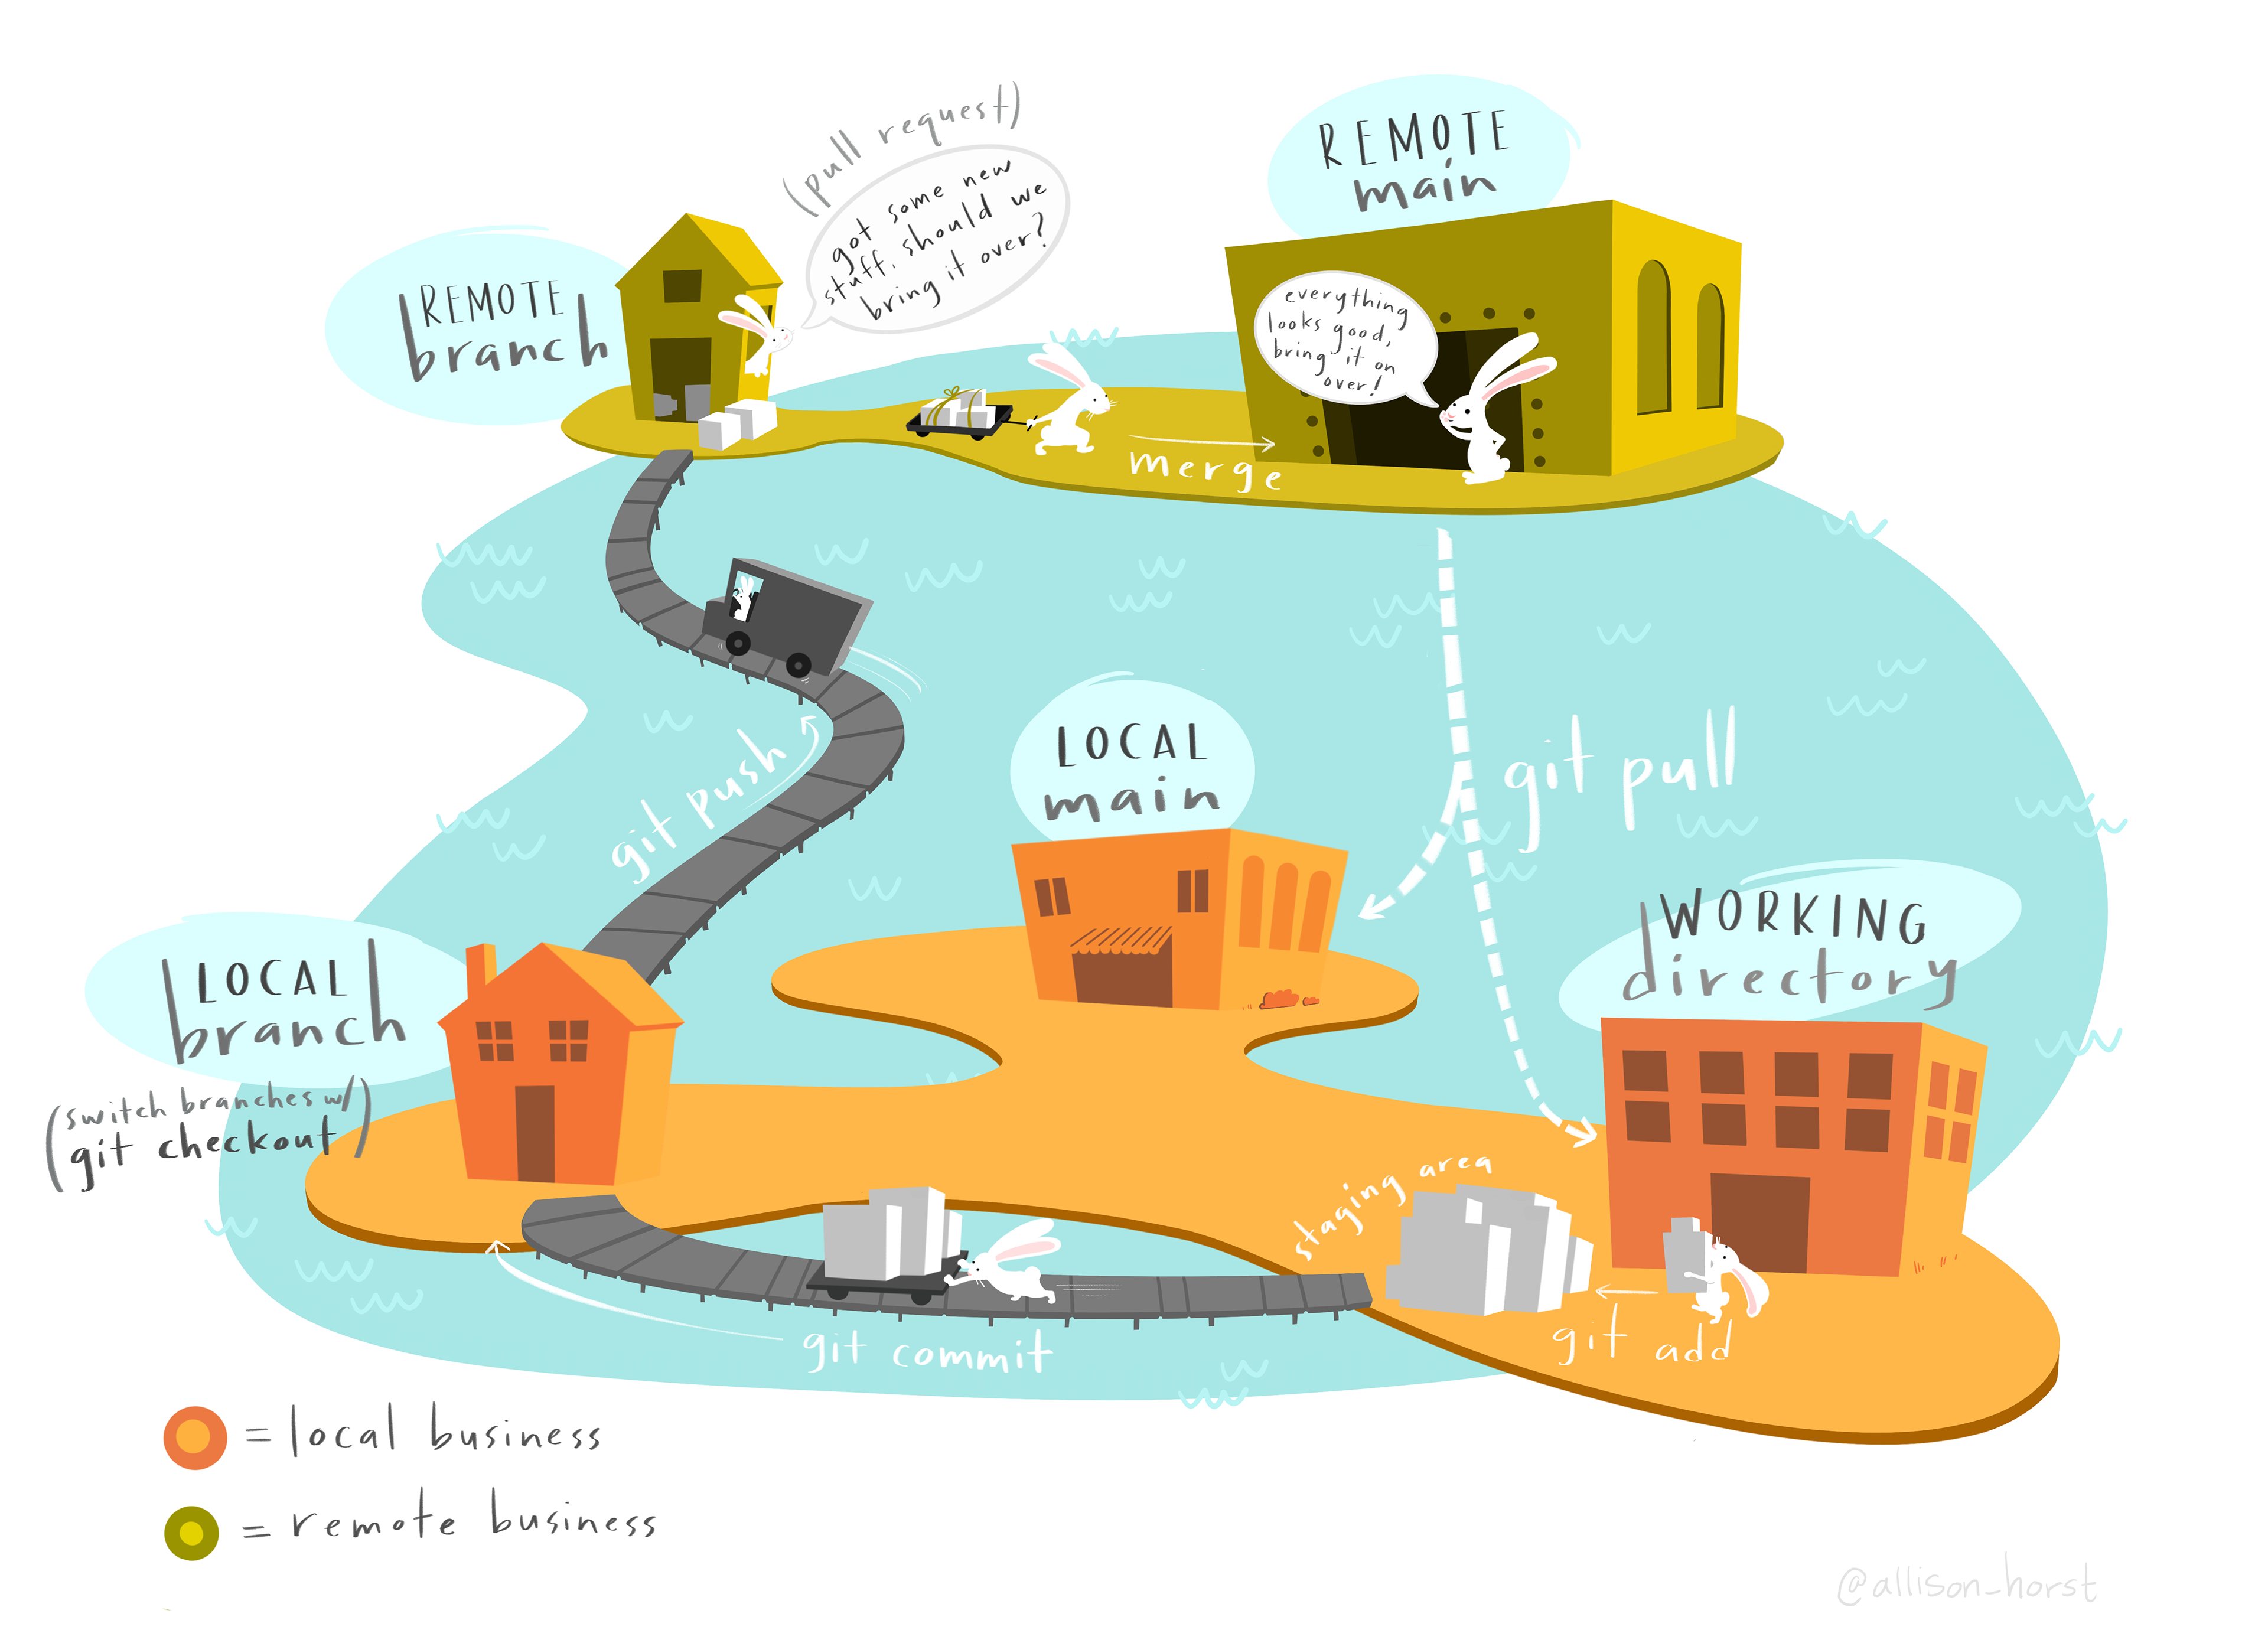
Art by: Allison Horst
From Meme Git Compilation by Lulu Ilmaknun Qurotaini
For more memes see Meme Git Compilation by Lulu Ilmaknun